Calendar 2.0 Widget
The calendar capabilities of Percussion CM1 allow you to promote workshops, webinars, classes, or any date driven event using the Calendar Widget. Your site visitors can scroll through the calendar, hover over any event for a quick summary, or click the event listing to find out more on the event landing page.
Also, as part of a feature improvement for Calendar 2.0, multiple Google Calendar sources can be added to the calendar, which will sync any events associated with the configured calendar IDs.
For documentation on the original calendar widget, please refer to the information here: Calendar Widget
Creating a calendar involves creating a page or template with a calendar widget and then creating pages that will be displayed as events on the calendar. Calendars are automatically created as shared assets (and will live under /Assets/calendars). Google Calendars can be combined with events created within the Percussion CM1, or exclusively as your primary event source.
Note: Despite its title, assets created using the Events Widget do not automatically create events on a calendar.
Define your calendar
When creating a calendar, you have two display choices -- a full calendar or a mini calendar. A mini calendar can be linked to a full calendar so that you can ensure the two are synchronized. By using the same calendar asset, when an event page is added to the calendar it will be associated with both the mini and full calendar. Full calendar widgets in Percussion are not responsive and therefore do not display well on a mobile device.
Note: You do not need a full calendar to have a mini calendar, however, in order for the mini calendar to link to events, it should be integrated with a full calendar.
Use the following steps to create a full calendar:
1) Create a new page to display your calendar.
2) Open the Layout tab, select the Calendar 2.0 widget.
![]()
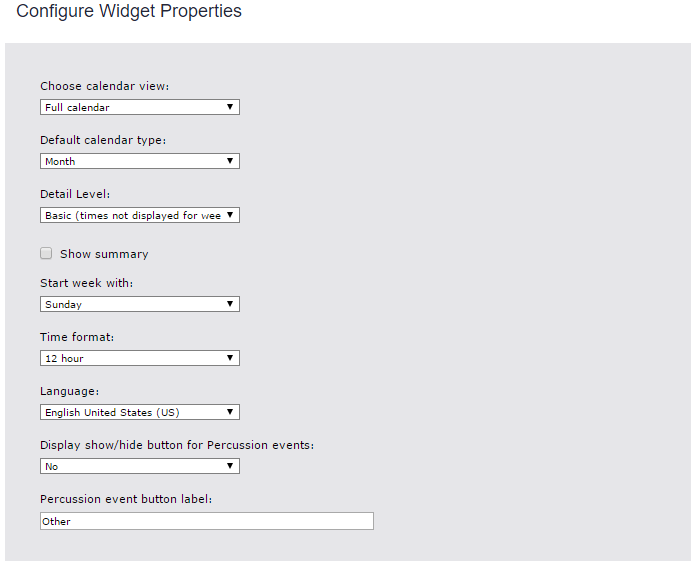
3) Select the configure icon to edit the calendar widget properties. Select the Calendar View to be Full Calendar.
4) Click OK to save and close the configure widget properties window.
5) Click Save to save the Layout.
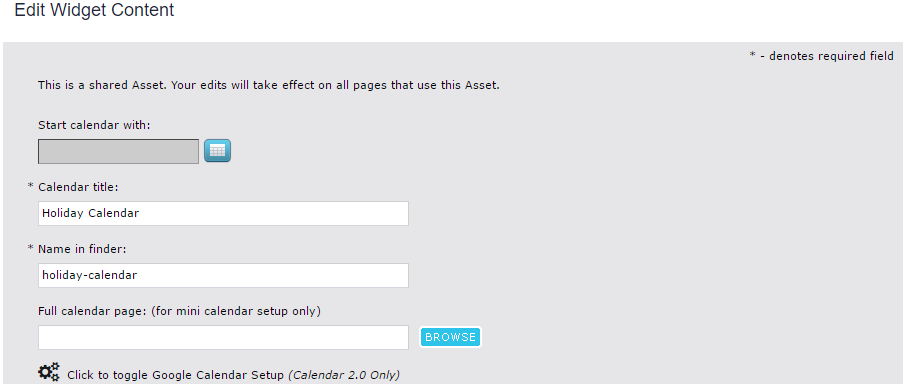
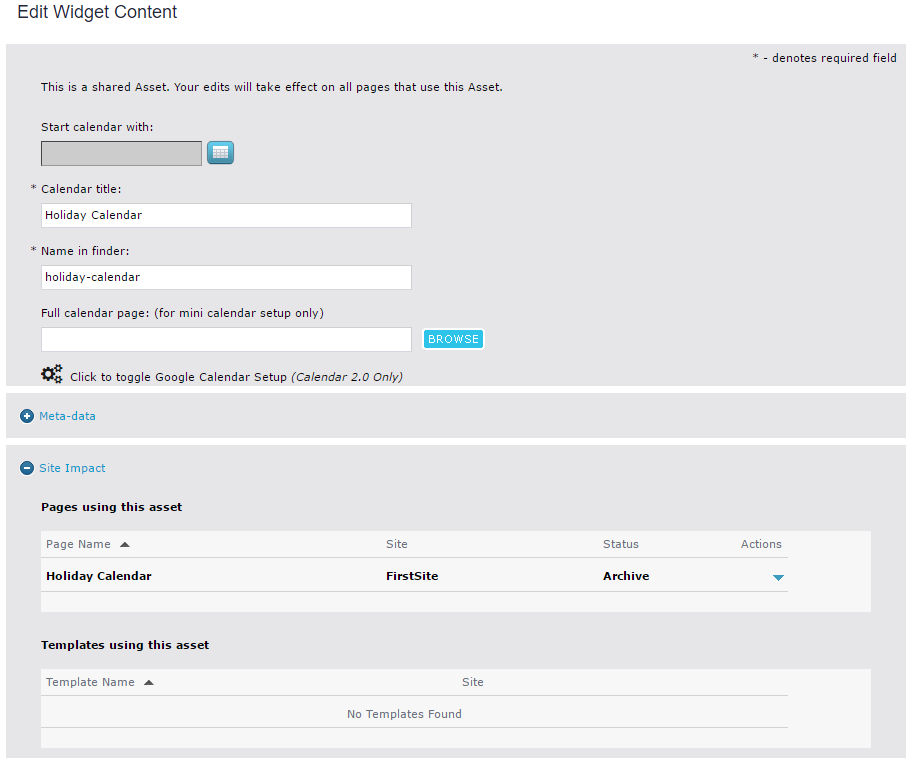
6) Open the Content tab, select the edit icon to edit the calendar widget content.
7) Enter the Calendar title and name.
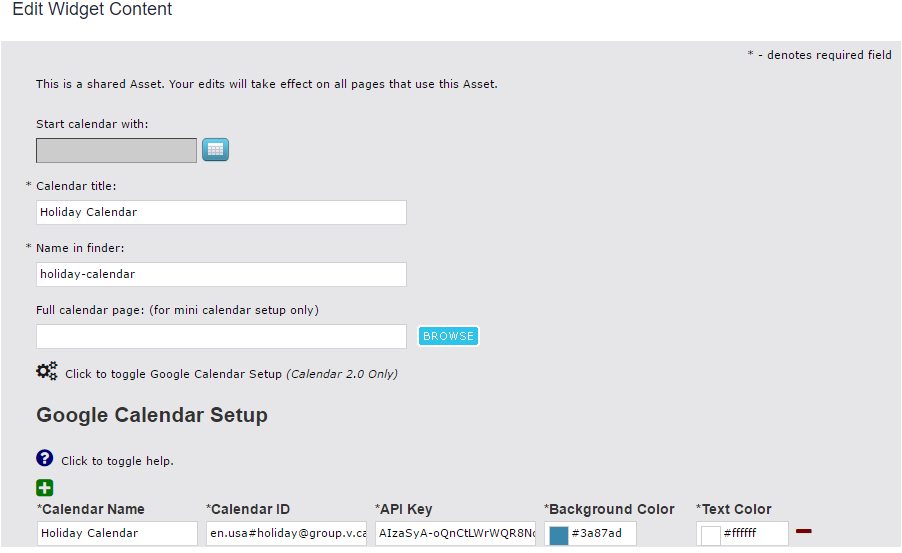
8) (Optional) Click the gear icon to expand the Google Calendar Setup Section and follow the instructions below:
Integration of Google Calendar sources requires the following information:
- The calendar name as you would like it appear on your page.
- The ID of the Google Calendar you would like to add.
- A Google Calendar API Key.
If all of the Google Calendars you are planning to integrate are managed by the same Google account, the same API key can be used for each calendar. However, if the they are managed by separate Google accounts, it is a best practice to create an API key for each calendar within the calendar owner accounts.
The steps below must be followed to enable Google Calendar integration.
- Generate a Google Calendar API key:
- Navigate to the Google Developer Console and create a new project.
- Enter the newly created project and select Library on the sidebar.
- *Find "Calendar API" in the list and set it to ENABLE.
- On the sidebar, select Credentials and choose Create credentials > API key and then select "Browser key"
- To control your API key usage, it is recommended to enter the domains that will be hosting your calendar.
- The new API key will be generated, but may take a short period of time before it can be actively used.
- Make your Google Calendar public:
- Within Google Calendar settings, select "Calendars", and choose the calendar you would like to configure.
- Select "Share this Calendar".
- Check the "Make this calendar public" option.
- "See all event details" should be chosen from the dropdown.
- Click the save button.
- Retrieve your Google Calendar ID:
- Within Google Calendar settings, select "Calendars", and choose the calendar you would like to view.
- Across from the Calendar Address: section, next to the ICAL and HTML buttons, will be your Calendar ID.
Once you have all of the required information, click the green plus sign icon to add a new row to the calendar setup. Then, enter the calendar name as you would like it to appear on your page, the calendar ID, and your API key. You can also select the background color and font color of the events. Additional Google Calendars can be added by clicking the plus sign icon again until all calendars have been added. Individual calendars can be removed by clicking the minus sign icon.
8) Click Save to save your changes.
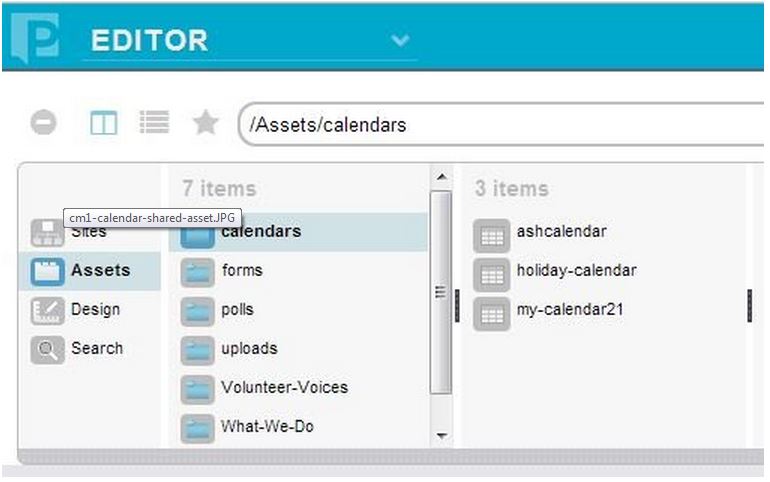
A shared calendar asset will be created in the Assets library under calendars. If you are creating a mini version of the calendar also, the mini calendar should use the same asset as the full calendar. By using the same shared asset, when an event page is added to the calendar it will be associated with both the mini and full calendar.
9) In the Content tab, when you open the configuration settings and scroll down you will now see two additional sections. Under Meta-data you will see the ‘calendars’ Folder Path, and under Site Impact you will see which Pages and Templates are using this calendar. You can also use the Actions button to jump quickly to a page in the Finder window or open up a preview.
To create a mini calendar:
1) Create a new page to display your calendar.
2) Open the Layout tab, select the calendar widget.
3) Select the configure icon to edit the calendar widget properties.
4) Choose Mini calendar for the calendar view.
5) Click OK to save and close the configure widget properties window.
6) Click Save to save the Layout.
8) From the Assets library, under the calendars folder, drag and drop the same calendar asset you created for the full calendar onto the calendar widget.
Create Calendar Events
To add an event to the calendar:
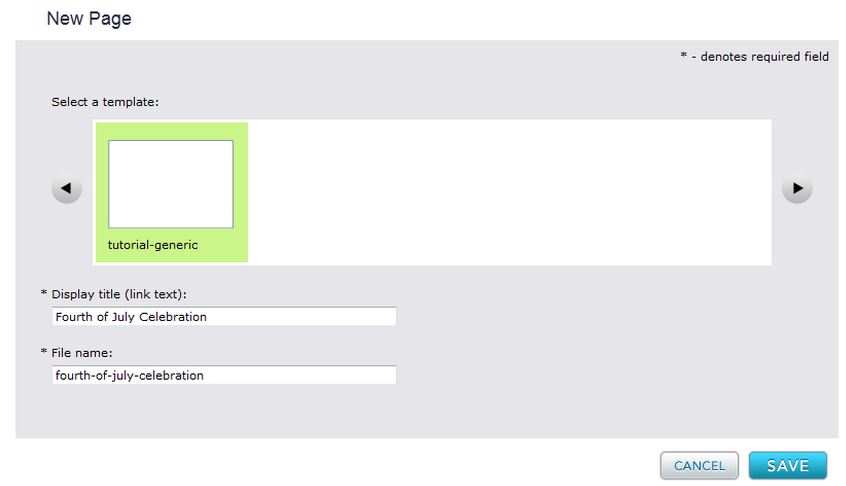
1) Create a new page to capture details about your event.
2) Under Content tab, edit the meta-data.
3) Expand the Calendar option.
4) Choose a calendar.
5) Enter a start and end date for the event.
6) Click OK to save.
7) Add a rich text widget to your page to display details about your event.
The calendar will display the event and will provide a link to open it.
Widget Style Properties
CSS Root Class - A text box in which you can enter a CSS class that you want to apply to the rendered content. Your site designer can provide you with the class name. This can be configured from the Template's Style tab and editing the widget's properties from here.

