Redirect Management
Redirect Management provides the ability to manage how site visitors will be rerouted in the event that they attempt to access a page that has been renamed, moved, or archived.
Redirects can be set up on individual files or entire directories. For example: old-product-name.html can be redirected to new-product-name, or www.site.com/folder/old-folder can be redirected to www.site.com/new-folder.
Manual Redirect
Redirects can be manually managed.
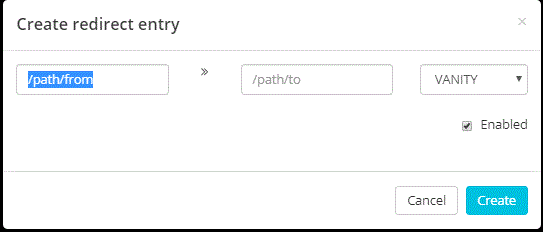
To create a redirect, use the +(plus) icon listed in the toolbar of the editor, fill in the fields and finally click the "Create" button.
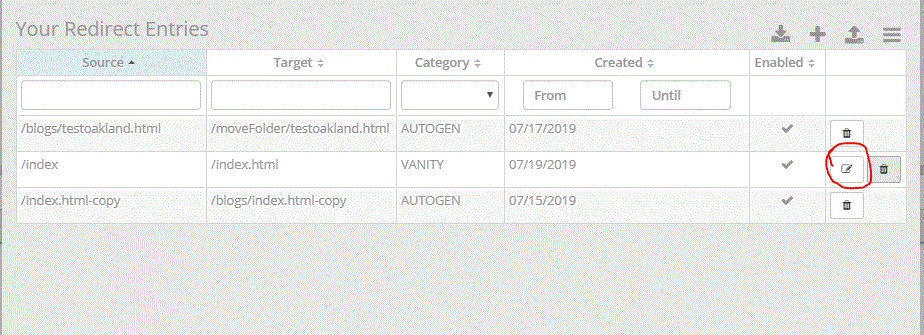
To edit a redirect, use the edit icon listed towards the end of redirect row as shown in below screenshot.
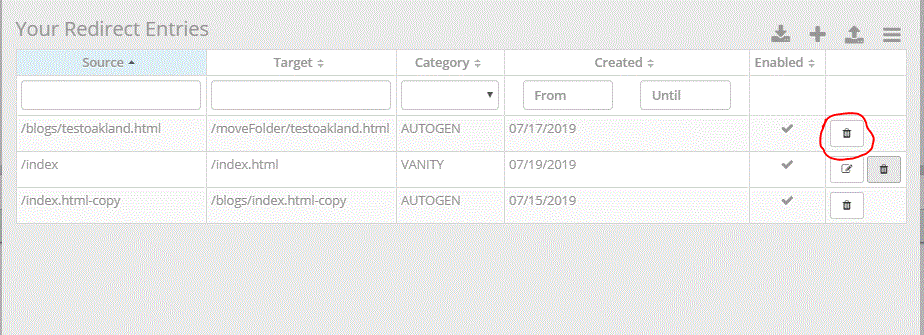
To delete a redirect, use the trash icon listed towards the very right end of redirect row as shown in below screenshot.
Initial Setup/Import existing redirect
As part of the initial setup of the website, you may wish to migrate your existing redirects from your webserver. Percussion provides the ability to upload redirects in CSV format. To upload a set of redirects:
Add the Website Configuration gadget on the Dashboard
Click the Edit Configuration button
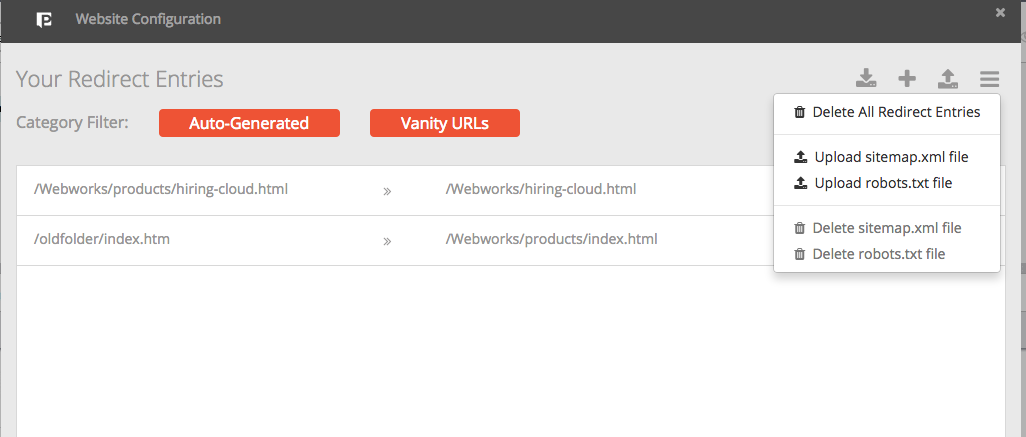
Click the Import button on the far right
See the table below for guidelines on which fields to use in your redirects file:
Field | values | Definition |
category | VANITY, AUTOGEN | The type of redirect. Autogen are redirects automatically created by the Percussion CMS whenever published files are moved, deleted or renamed |
condition (required) | The path and name of the file or directory below the root (i.e., /webworks/products/oldproduct.html) | |
createdOn | Date the redirect rule was created | |
enabled | TRUE, FALSE | Determines if the redirect rule is active or not |
id | A unique ID for the redirect rule. Autogenerated by Percussion. Values entered here will be ignored. | |
key | The license key for the customer usage of redirect manangement | |
permanent | TRUE, FALSE | This field identifies the type of redirect. True equals a permanent redirect or a 301 code. False is temporary or a 302 code. |
redirectTo (required) | The path and name of the file or directory below the root where the visitor will be redirected (i.e., /webworks/products/newproduct.html) | |
site | The name of the site. This must correspond to name of the site in the CMS. (i.e., www.sitename.com) | |
subkey | A secondary ID for the redirect rule. Autogenerated by Percussion. Values entered here will be ignored. | |
type | CM1 | Type can only be CM1 |
Autogenerated Redirects
Once pages are published, in the event of a rename or move, a redirect is created automatically. Once pages or folders are archived or deleted, the user is prompted to create a redirect rule. In the event of an archive or delete, the user is prompted to select where they want site visitor to be redirected to.
Autogenerated redirect rules can then be managed through the Website Configuration gadget on the dashboard. You can remove any redirect rules that are no longer needed directly from the list of redirects.
Vanity URLs
Vanity URLs can be established through the Website Configuration gadget. Vanity URLs include any redirect rules you create manually, including those uploaded using a CSV file. Vanity URLs can be created individually through the Gadget by clicking the Create button.
Setting up sitemap.xml
Percussion allows you to upload your sitemap.xml. Please note that CM1 does not generate or validate the sitemap. To upload your sitemap:
Enable the Website Configuration gadget on the Dashboard
Click the Edit Configuration button
Click the Setting menu button on the far right.
Click Upload sitemap.xml file

If you need to replace this file, it is recommended that you first delete it before uploading a new sitemap.
If you have multiple sites, before you open the Website Configuration gadget, you will first need to select the site you want to manage. To select a site, you need to double-click that site in the Finder. This action will open the Navigation page. From there, return to the Dashboard and open the Website Configuration gadget.
Setting up robots.txt
Percussion allows you to upload your robots.txt. Please note that CM1 does not generate or validate this file. To upload your robots.txt:
Enable the Website Configuration gadget on the CMS Dashboard
Click the Edit Configuration button
Click the setting menu button on the far right.
Click Upload robots.txt file
If you need to replace this file, it is recommended that you first delete it before uploading a new robots.txt.
If you have multiple sites, before you open the Website Configuration gadget, you will first need to select the site you want to manage. To select a site, you need to double-click that site in the Finder. This action will open the Navigation page. From there, return to the Dashboard and open the Website Configuration gadget.
Custom error page
By default, Percussion provides a basic 404/error page in the event that a site visitor tries to access a URL that does not exist and for which there are no redirects. To create your own error page, simply create an error.html page at the root of your site.


